A blog, put simply, is nothing more that a list of content. In the past, blogging platforms were viewed as only useful for one purpose: content. How boring is that?
Fortunately for us, this couldn't be furthest from the truth.
Many CMSs, namely WordPress, have built-in ways to use the blogging platform to create custom feeds of content. WordPress calls them "custom post types," and they were ground-breaking when they were introduced into the platform. It changed the way that people used blogs.
Although not immediately evident, HubSpot's blogging platform has the same function as WordPress's custom post types. You can use the platform to create a whole host of custom uses.
This post will be the first in a series of articles that will help you elevate your site and make it easier to maintain using HubSpot's blogging platform.
Our first use of the blog system is something that I get asked to create quite often: we will be completing a press release blog.
Let's get started
1. Planning
In our case, the press releases are going to need a couple of things:
- The option for a featured image
- A 'published on' date
- Separation and categorization by year
- The ability to link to either an article hosted in your HubSpot platform or an external source, such as a PR agency website or another featured blog article
Once we have our Press Releases blog planned out and have a decent design, we are ready to start setting up the blog and developing our template.
2. Setup
The next step in this process is creating a new blog. Under "Content Settings" in your HubSpot portal, go to the blog link in the sidebar menu. Once there, click the "add new blog" button. Name your blog and give it a url. In this example, we've named out 'Press Releases.'
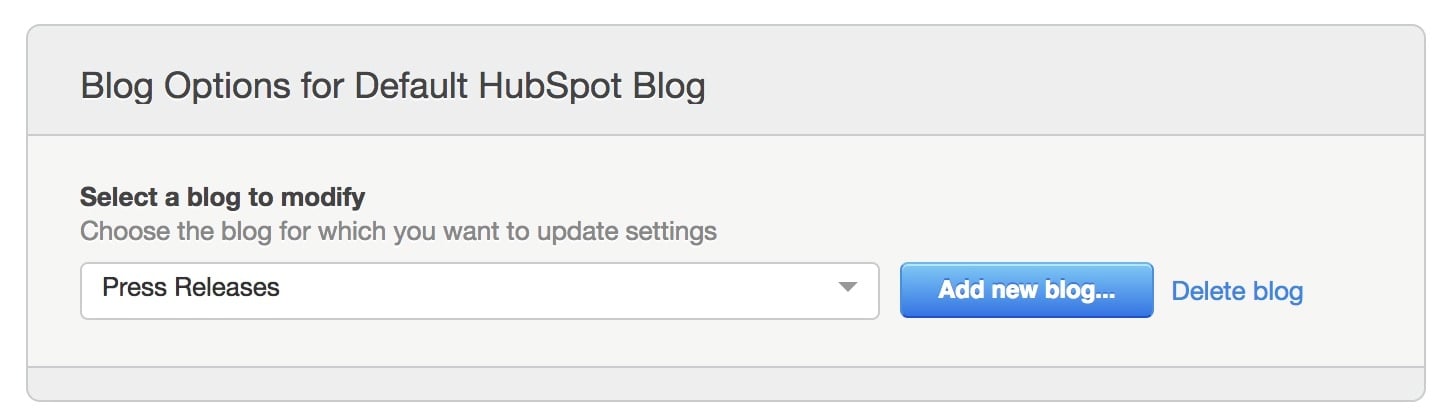
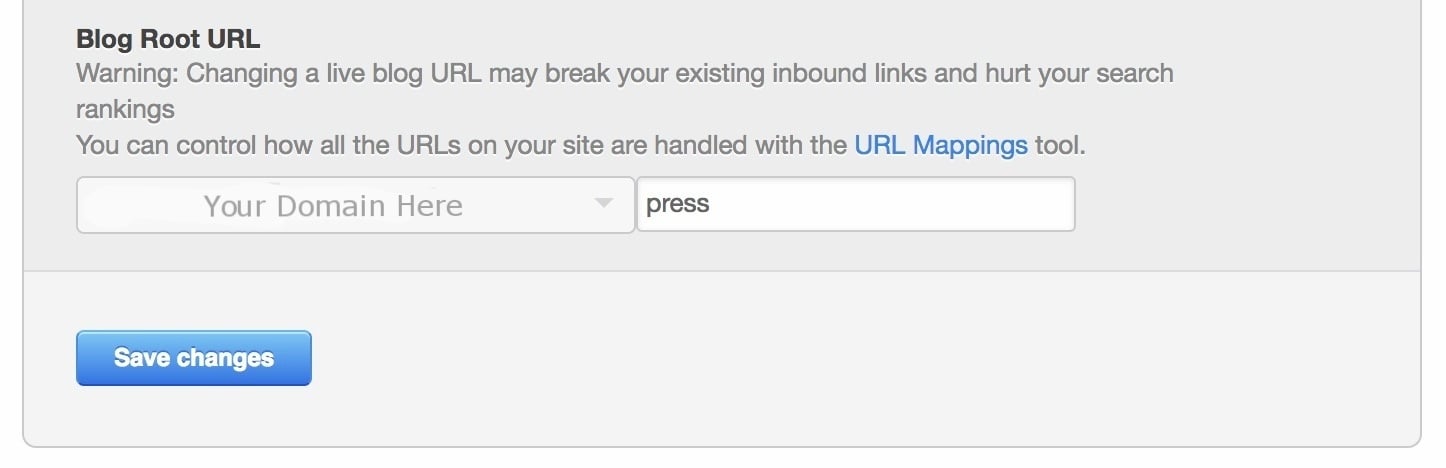
We have also given it a url of /press.
Scroll down the blog settings a little further to "Date Formats" and click "Custom format" next to Publish Date Format. In the dialog window that appears, type YYYY into the input and click Create Date Format.

Once we have the blog set up in out system, we are ready to start developing our Press Release Template.
Note: We are missing one portion of our Press Releases setup: selecting the correct template for our press blog. That step will come after we have actually created the new templates.
3. The Single View or Article Template
The single view or article view is the most important part of any blog-related template. The reason for this is that the view template will dictate the options that will be available to your posts, and determine all of the available features of our press release template.
The good news about this template is that it is generally the easiest part to code.
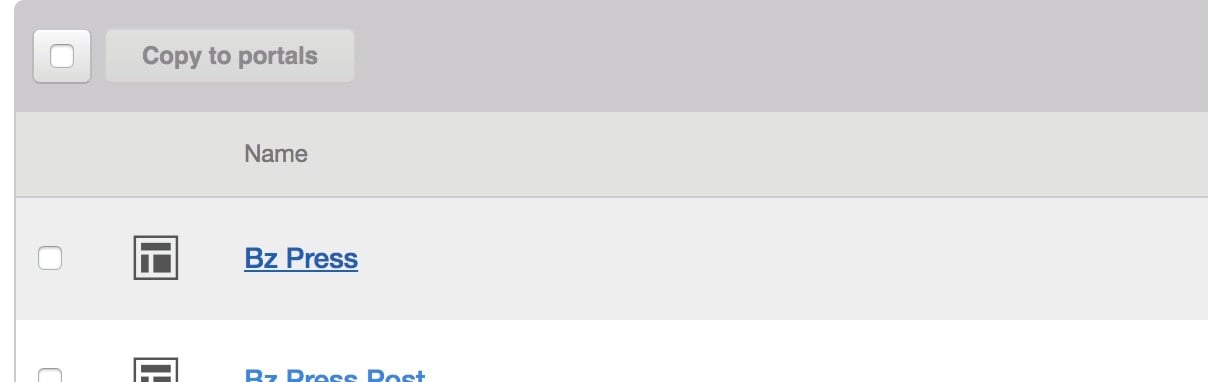
Go to the Design Manager and click "New Template." A dialog box will appear. Select "Template Builder" and then "Blog." After clicking 'Create,' select the folder where your new template will live, name the template (in this example, we've gone with 'Bz Press') and click Create.
Open the template in the Design Manager and click Edit Post Template. One of our features will be defined here: The ability to link to external urls.
The first item in your template should be this code:
{% text 'extlURL' label="External URL", export_to_template_context='True' %}
This HubL module is a text module, in which we'll be able to add an external url to another website or page instead of the internal URL of the blog (if nessesary).
The next piece of code is the post body tag, which looks like this:
{{ content.post_body }}
All together, your code may look something like this:
{% text 'extURL' label="External URL", export_to_template_context='True' %}
<div class="blog-section">
    <div class="blog-post-wrapper cell-wrapper">
       <div class="blog-section">
            <div class="section post-body">
                {{ content.post_body }}
            </div>
        </div>
    </div>
</div>
4. The Listing Page
As I stated before, a blog is essentially just a list or feed of content. In this case, a press release blog happens to be the same.
Open the "Edit Listing Template" section of the Press Release template. This is where our listing code will go.
In this case, there are a couple items that are different from a normal blog.
For starters, if you remember, we changed the blog date format to year-only. This helps with grouping the articles by year, but it doesn't do much for displaying the actual publish date.
What we have below is the published date function, which normally ouputs an ugly date stamp. However, with the datetimeformat filter on it, we can tell it how to display the date. %b is the month in 3 leter abreviations, %d is the date in 2 digit numerical form, and %Y is the year. This will help you get your year back.
<div>
   <span class="month">{{ content.publish_date|datetimeformat('%b') }}</span>
   <span class="day">{{ content.publish_date|datetimeformat('%d') }}</span>
   <span class="year">{{ content.publish_date|datetimeformat('%Y') }}</span>
</div>
The next step for this template is to test whether the author is using an external URL or not:
{% if content.widgets.extURL.body.value %}
    <div class="press-item__ext-link">External Link <i class="fa fa-external-link"></i></div>
{% endif %}
In this example, we are outputting the words External Link to signify it is an external URL. However, you can also use this test to show internal links or external links.
You may also want to test for a featured image the same way you test for an external URL. That way, you won't display the image if there isn't a reason to.
5. Group by Year
Next, we need to group the posts by year. We can do this using the groupby function:
    {% for group in contents|groupby('publish_date_localized') %}
    <div class="press-listing__group">
       <h1 class="press-item__year-group">{{ group.grouper }}</h1>
           {% for content in group.list %}
This little snippet of code shows us how the groupby filter works. You can see that we are first grouping using the publish_date_localized function. Then, we can call the item we grouped by using the group.grouper function. Lastly, we can loop through the segmented group and output the content that belongs in its group in the format we want it to display.
When all said in done, the listing template code should look like this:
<div class="press-section">
    <div class="press-listing">

        {% for group in contents|groupby('publish_date_localized') %}

            <div class="press-listing__group">
                <h1 class="press-item__year-group">{{ group.grouper }}</h1>
                {% for content in group.list %}
                    <div class="press-item row-fluid-wrapper flex-grid">
                        <div class="row-fluid">
                            <div class="span1 press-item__date">
                                <span class="month">{{ content.publish_date|datetimeformat('%b') }}</span>
                                <span class="day">{{ content.publish_date|datetimeformat('%d') }}</span>
                                <span class="year">{{ content.publish_date|datetimeformat('%Y') }}</span>
                            </div>
                            <div class="span11 press-item__body">
                                <!--post summary-->

                                {% if content.widgets.extURL.body.value %}
                                    <div class="press-item__ext-link">External Link <i class="fa fa-external-link"></i></div>
                                {% endif %}

                                {% if content.featured_image %}
                                <div class="press-item__header">
                                    {% if content.widgets.extURL.body.value %}
                                        <a href="{{ content.widgets.extURL.body.value }}" title="" class="press-item__featured-image" style="background-image: url({{ content.featured_image }});"></a>
                                    {% else %}
                                        <a href="{{content.absolute_url}}" title="" class="press-item__featured-image" style="background-image: url({{ content.featured_image }});"></a>
                                    {% endif %}
                                </div>
                                {% endif %}
                                <h2 class="press-item__title">

                                    {% if content.widgets.extURL.body.value %}
                                        <a href="{{ content.widgets.extURL.body.value }}">{{ content.name }}</a>
                                    {% else %}
                                        <a href="{{content.absolute_url}}">{{ content.name }}</a>
                                    {% endif %}
                                </h2>
                                <p class="press-item__summary">
                                    {{ content.post_list_content|striptags|truncate(300) }}
                                </p>
                            </div>
                        </div>
                    </div>
                {% endfor %}
            </div>

        {% endfor %}

    </div>
</div>
Style it a bit and you're all set. When you are finished adding a test press release, it should work like a dream.
    .press-listing__group:not(:last-of-type) {
        margin-bottom: 4em;
    }
    .press-item__year-group {
        color: black;
    }
    .press-item {
        margin-bottom: 1.5em;
    }
    .press-item__date {
        color: blue;
    }
    .press-item__date .month {
        display:  block;
        text-transform: uppercase;
        font-size: 1.1em;
        line-height: 1;
        text-align: center;
    }

    .press-item__date .year {
        display:  block;
        text-transform: uppercase;
        font-size: 1.1em;
        line-height: 1;
        text-align: center;
    }

    .press-item__date .day {
        display:  block;
        text-transform: uppercase;
        font-size: 2.3em;
        line-height: 1em;
        text-align: center;
        font-weight: 700;
    }

    .press-item__body {
        border-left: 1px solid grey;
        padding-left: 1.5em;
    }
    .press-item__ext-link {
        color: darkgreen;
        text-transform: uppercase;
        font-size: .7em;
        margin-bottom: .35em;
    }
    .press-item__featured-image {
        display:  block;
        height:  200px;
        background:  #eee;
        margin-bottom: 1em;
        background-size: cover;
    }
    .press-item__title {
        margin-top: 0;
        font-weight: 400;
        line-height: 1.2;
    }
    .press-item__title a {
        color: blue;
        text-decoration: none;
    }

    @media screen and (max-width: 768px) {
        .press-item__date .month,
        .press-item__date .year,
        .press-item__date .day {
            text-align: left;
            display: inline-block;
            font-size: 1em;
            font-weight: 300;
            color: lightgrey;
        }
        .press-item__date .month,
        .press-item__date .day {
            font-weight: 400;
        }
        .press-item__body {
            border-top: 1px solid lightgrey;
            border-left: 0 solid lightgrey;
            padding-top: 1.5em;
            padding-left: 0;
        }
    }
In this example, ours turned out pretty good, if you ask me:

You're Done!
This is a great way to add some dynamic content and easy editing to your site. I hope you've learned from this article, and if you have any questions or possibly a better way to do this, please comment below!
.png)
Comments