
As a designer/developer here at Bluleadz I have learned that you should not only develop templates that are easy to use, but you should also develop templates that allow any individual to customize a page with ease.
For those of you that are new to HubSpot’s world, welcome. HubSpot’s custom modules can be created from within the design manager and are filled with endless possibilities. To emphasize this concept even more you’ll be able to re-use any custom module you create and utilize them in any future page templates!
For this example, I’m going to go through creating a customizable hero module, this may seem a little basic, but as someone in the world might’ve once said “It’s always best to start with the basics”. So here we go.
The Module Base
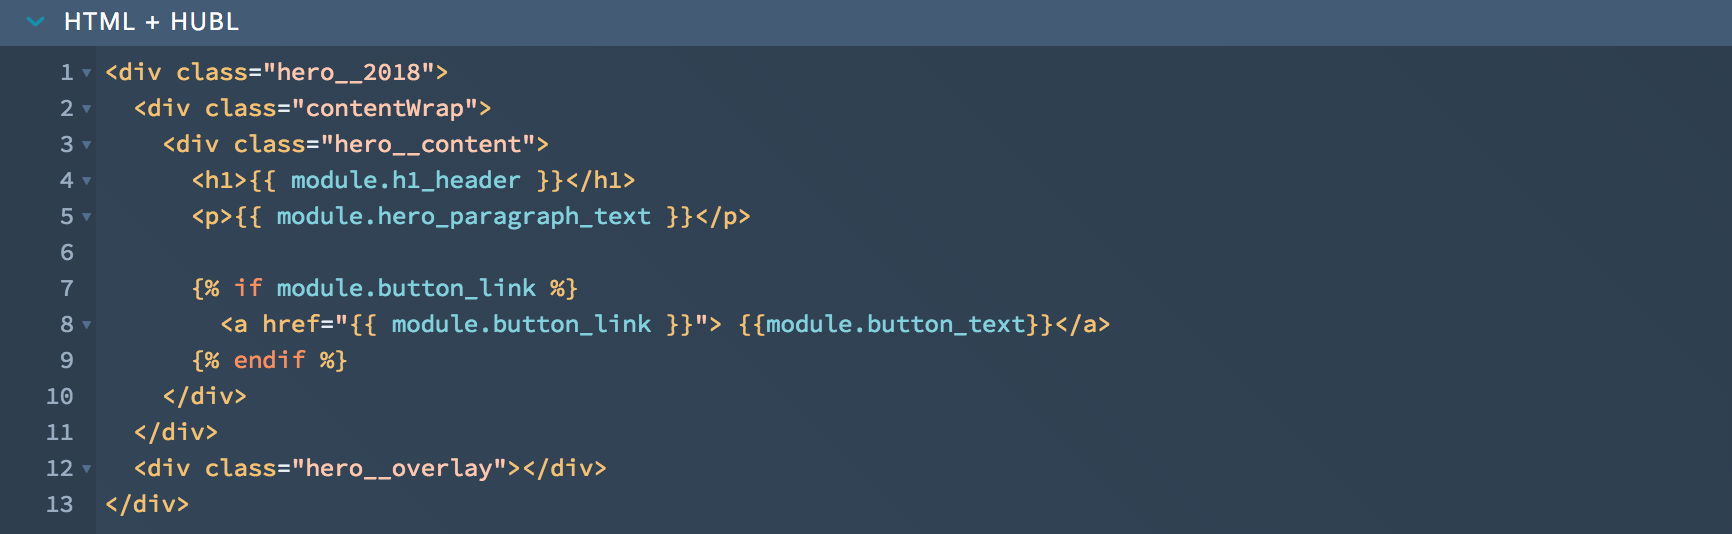
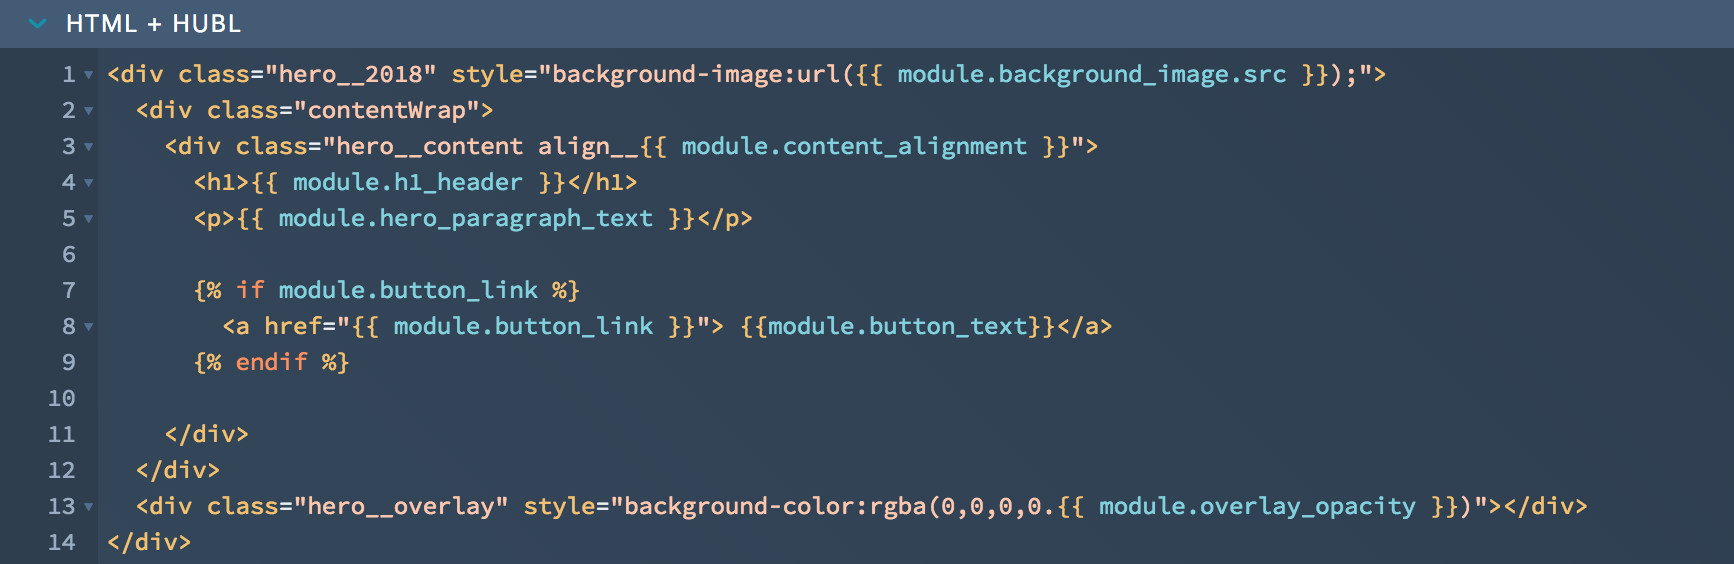
To start we are going to code a hero container, a content container, and a hero overlay. I personally like to create the base and container to every section I am going to add to; I have personally found this to be a great way to stay organized and focused on what code needs to be inputted.

Adding Main Content Elements
Next up, we are going to add the very important hero content elements. So here is where I start off with the H1 Header, Paragraph text, and an optional button. To create these fields we’ll need a Text Field for the header, paragraph text, button link, and button text.
We are going to create our first logical ‘If statement’ that essentially states “if there is a ‘Button Link’ then display this anchor tag”, if the field is left blank then nothing will display. Using ‘If statements’ in your custom module are going to be key to the whole customizing process!
Adding the Background Essentials
Now let’s say you want your hero to have a background image, or maybe an overlay color on top of your image. Well, i’m going to show you just how to do that!
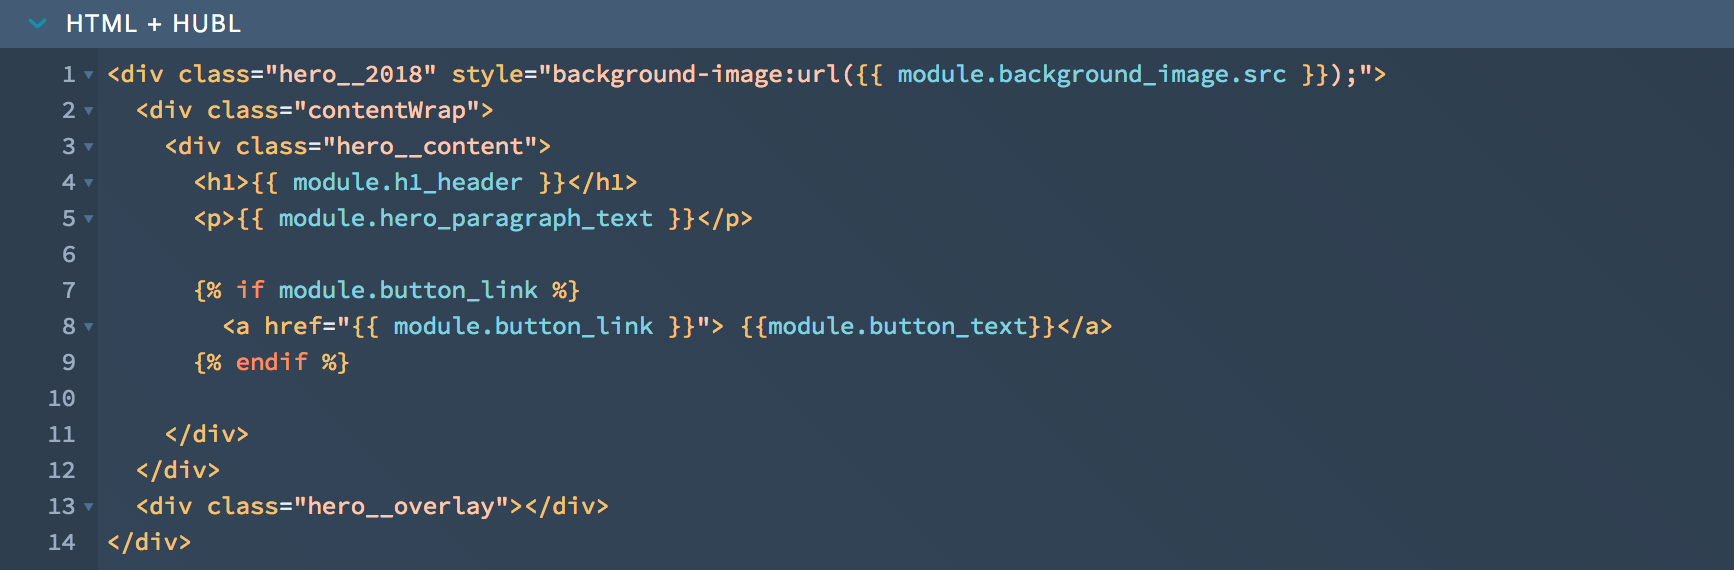
First up, create a new field using the image selector. By default, when you copy the snippet of code, it is going to add an ‘If statement’, we’re going to remove that since it isn’t really necessary at this point. However an ‘If statement’ will work great if you can have alternate hero style you want to display if there is no image selected.
We are going to use inline styling to display the background image, since this is a piece that will be able to be intermintelly changed in the page editor.
The Overlay
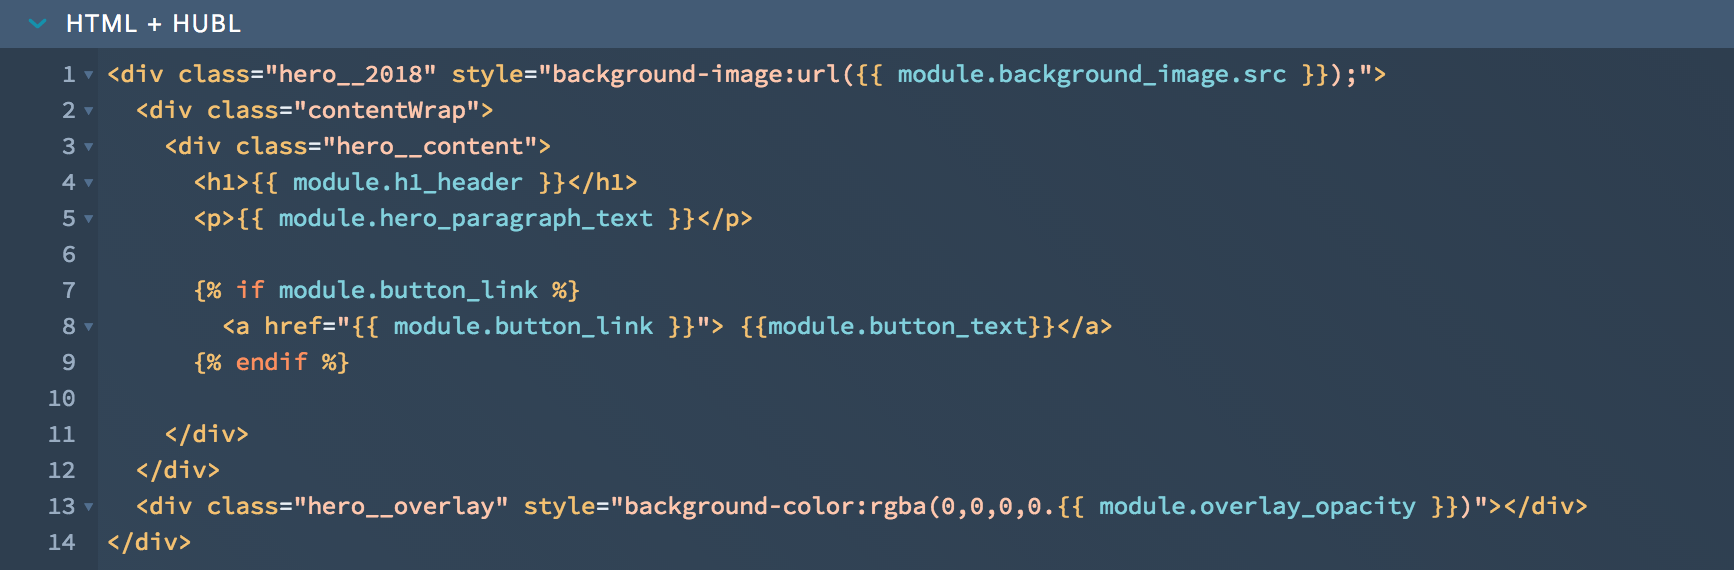
The hero overlay is going to be the color we add on top of the image, and just behind the content. Many websites will use a darker opaque color overlaying the hero image so the content in the hero will stand out more.
As you can see i’ve added initial css styles for the ‘hero__overlay’ class already. I generally like to use the dark color that remains consistent with the rest of the site. For a easy-to-use feature in the page editor, we are going to go ahead and allow the user to be able to change the opacity level just by typing in a number.
To add this into the custom module, you will create a new Text Field, add in helper text to state that any number from 1-9 will be valid, and we are going to be sure we add in a default number (5 is always a good median).
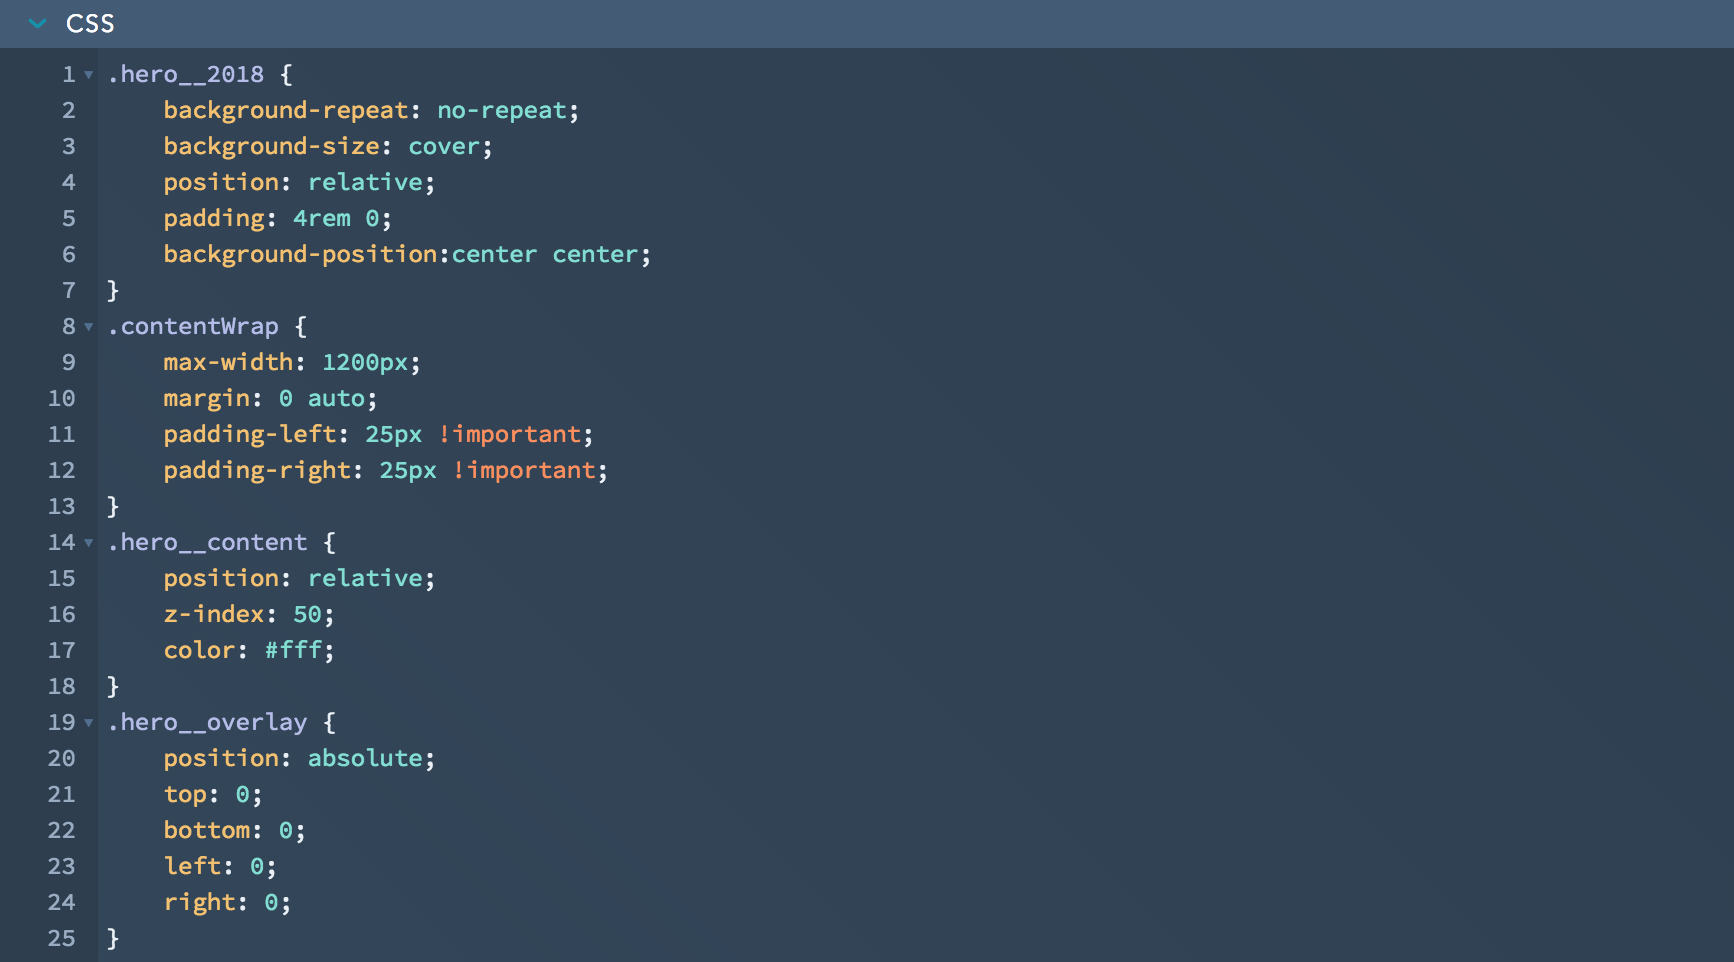
The CSS
Now let’s get real, none of this works without a little CSS. So, below are the basic styles that I have rounded up for the sole purpose of this tutorial. However, you should 100% modify this code to fit your site’s style and overall design.
The Fun Stuff
The fun stuff always includes the extra customizable elements. So in this example we are going to do a few things:
- Allow for various content alignment
- Create an option for a Arrow at the bottom of the hero.
- Allow the option for a Form in the hero
Allow for Various Content Alignment
Now let’s say you wanted to have optional alignment for your content; specifically left and center alignment. To do this we are going to create a logical Choice Field. Our labels and values are going to be as follows:
- Left Align
- Value: left
- Label: Center Align
- Value: center
- Label: Right Align
- Value: right
Now we are going input the starting class into the module itself. You’ll see in the screenshot below where we have inputted “align__”. We’ll copy the choice field snippet and past directly behind that align phrase.
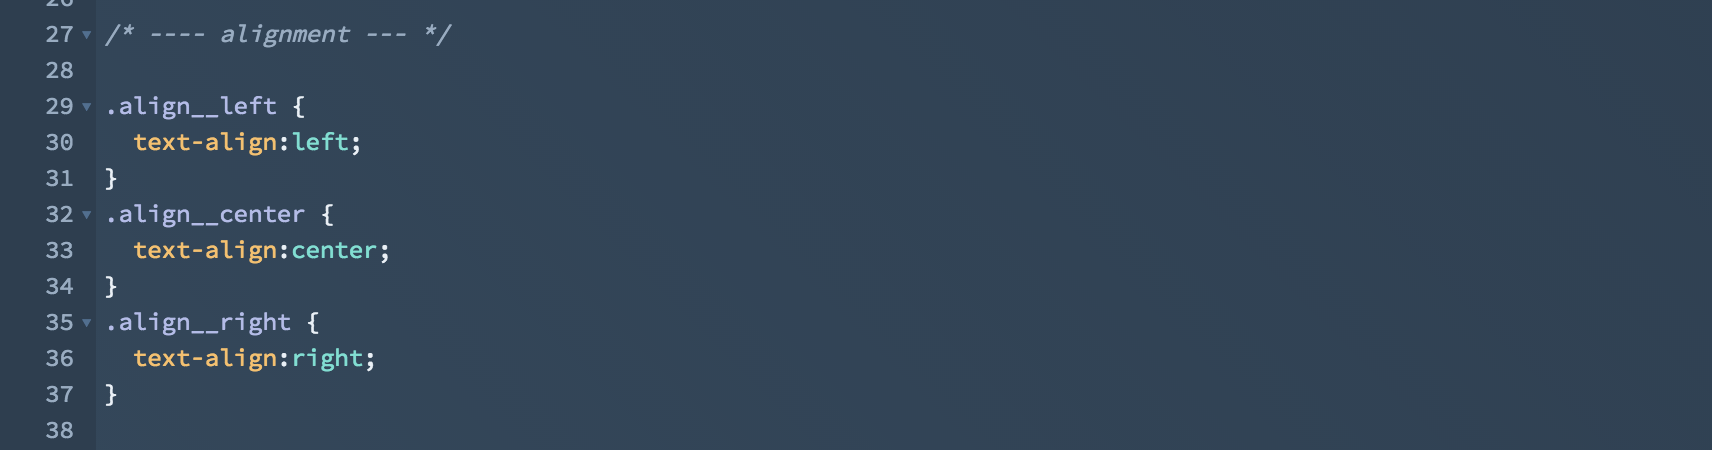
Below is the related CSS styles for the content alignment.
Creating an Optional Arrow
For this example we are going to create a logical Boolean that essentially acts as an on/off switch. A boolean either a true or false answer. So for this particular statement we are going to say “If boolean is selected ‘on’, show the hero arrow”. If the boolean is selected ‘off’, then nothing will be shown.
When I copy the field snippet, it will be output an ‘if statement’ and as so, I am going to wrap the entire Div inside the statement.
Bellow is the CSS:
Optional Form in the Hero
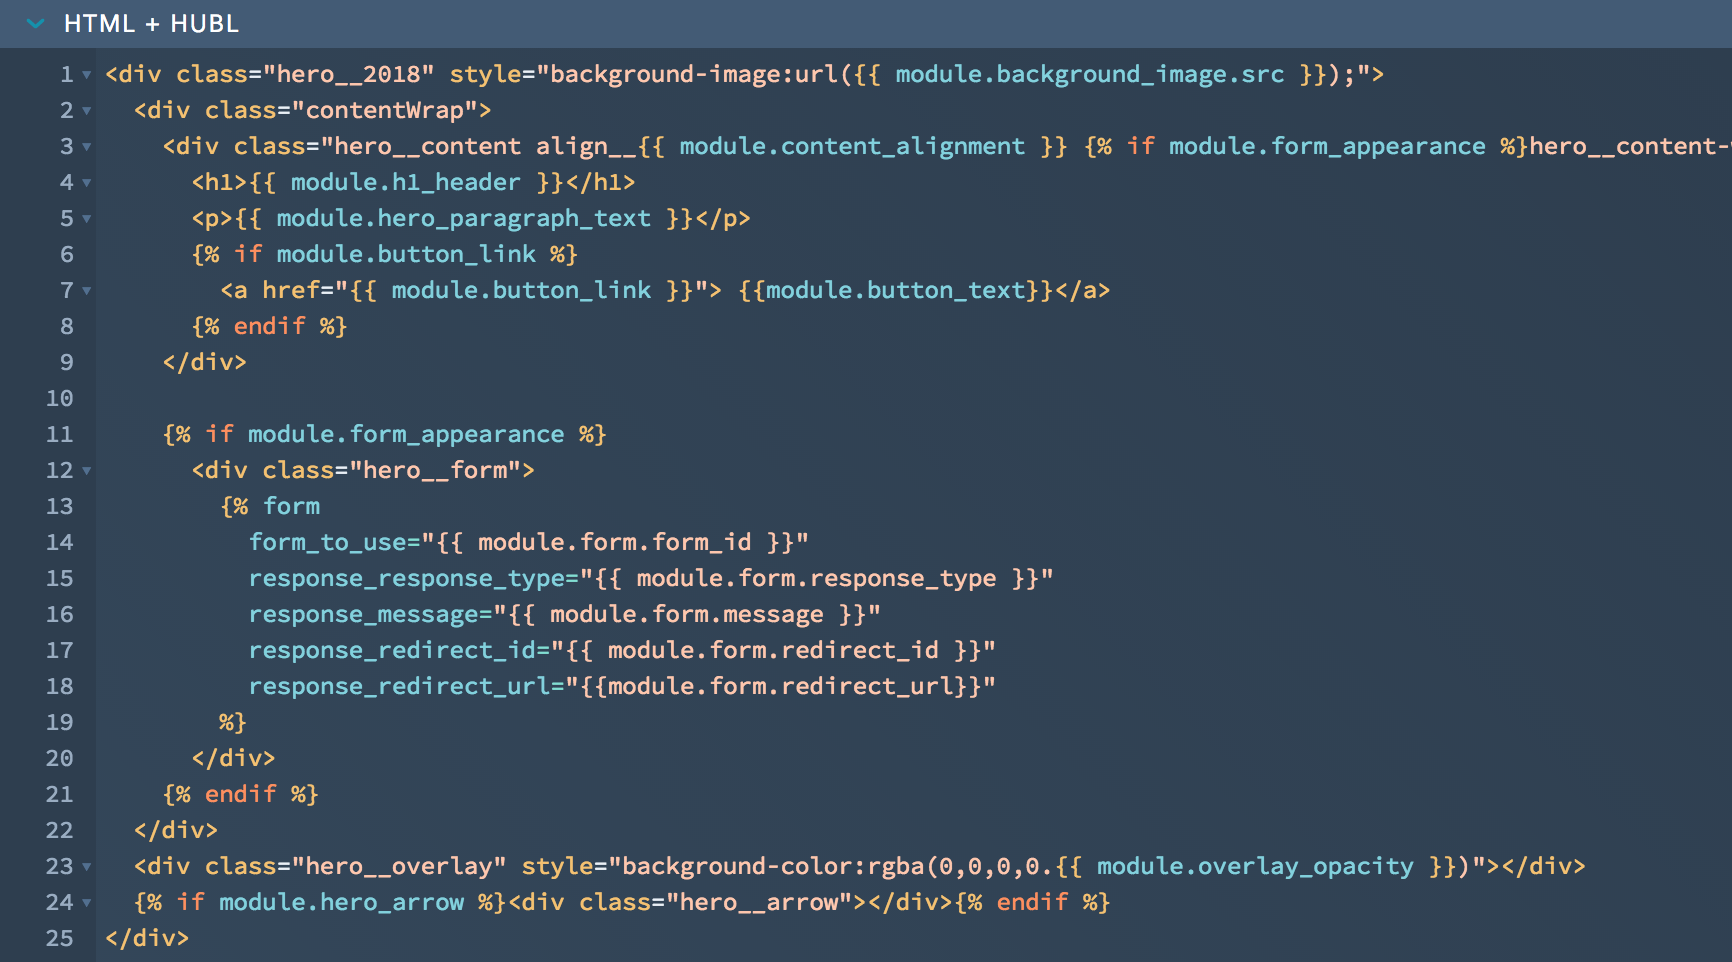
To begin I’m going to create a Form Field so this will allow anybody to select a any form in the page editor that will be related to that specific that is being worked on. I am also going to create another Boolean Field called “Form Appearance” that will be the switch that display/hides the form.
Since display and hiding the form will change the hero content positioning, i’m going to input an ‘If statement’ on the same line as “hero__content” that essentially states, “if the form appearance is true/on, then show the class called ‘hero__content-with-form’.
This is when you will then modify your CSS to handle both scenarios:
- Hero without a form
- Hero with a form
Below are 2 screenshots of the visual code.

Wasn’t That Fun and Easy?
That is it! This was just a quick tutorial to get you started so you can create your own unique modules. I know it may seem like a lot when you get started but once you start practicing with ‘If statements’ the possibilities will truly be endless. You will find yourself coding more so anyone can have the ability in the page editor to create unique site pages.
Do you have any questions? Or have any cool ideas in which you’ve implemented customizable options? I’d love to hear about them; leave a comment below and share.


.png)
Comments